Showing posts with label in_progress. Show all posts

Friday, April 20, 2012

Paperless Pattern drafting: Pattern Master Boutique


Lately I have been thinking a lot about the direction my dressmaking addiction should take. Self-drafting patterns seam to be a great challenge, but being able to make it on my PC instead of drawing table seems even more appealing to me. Still, the importance of understanding the principle of pattern drafting is crucial.

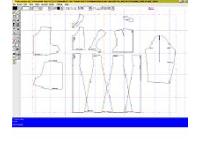
I purchased PatternMaster Boutique v4 a couple of years ago. The software allows to input your personal measurements and offers a choice of garment/detail styles to combine and get your unique style, which you can then save, edit and print out. Sounds good, but there are a few things that stalled me in my work with this software.

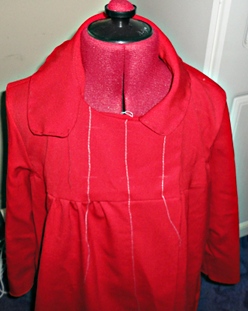
First of all, there are fitting issues. It is not that straightforward. When I put in my measurements, got my custom sloper prinetd out and sewn it, it just didn't look very good at all. (there photos are taken in 2008)


The issues were with excess fabric around the waist and the armholes, it just looked bad. The good thing about Wild Ginger - the producers of PMB and many other useful sewing software is their incredible customer support. They have a huge forum and any questions is answered within a day or two, and you can also email them directly.

When it comes to a sloper fitting, you have to take three pics (like above) and email them to Karen from support team with your measurement chart. I did just that and she emailed me back the adjusted chart. the idea is to adjust your measurements values until the sloper fits well, and then use the saved chart for the further designs.

Well, I didn't make another one, simply escaping to the inviting and familiar sewing magazine's patterns ( which still always need alteration). I have left the program alone and ended up uninstalling it.


Making a Gwyneth skirt has been a revelation to me. My sewing magazine odyssey is definitely coming to end- I have too many of them, huge stacks, but my mind keeps wandering elsewhere. If I have to alter every pattern , yet still not always the fit is good, why not learn drafting my own patterns at last! Even troubles with fit in PatternMaster could be easily corrected with such knowledge, bypassing all the paperwork!

Then I saw the RTW contest banner, and through entering I reconnected with my interest to draft my own patterns on a CAD pattern making  software.

I went back to my software stash and re-installed PMB4, dug out the instructional video from a class I took on their pattern editing software.

After watching it once, following the class instructions, I realised I am more familiar and fluent with it than I thought I would be. I easily drafted my own Gwyneth Skirt pattern. (This was after I actually made the skirt- I used Burda pattern to alter the paper version for the original.) I found the way to save it as a PDF and straight away uploaded Gwyneth Skirt pattern on Burdastyle.com- it felt great!


Originally, I used my own measuring chart, but for downloadable PDF I used Burda size 34 standard measurements. It all seemed to work great. the pattern didn't look as good as Collette's (hahaha, dream on sister!), but it looked better than some hand drawn ones.  It had very good pie-shaped markings to put the pattern together and row and column numbering, which will make alignment very easy. However the footer of each page said.:TempPrint.las and there was no way to change it into the name of the pattern at all. It just wrecked my head!

After contacting the support team, I learnt that my version of the software is way out of date, so these kind of things are not fixed anymore.  Their new version, PMB v5, has that and a lot of other issues sorted. So I took my credit card out and bought an upgrade. ( Thankfully the price is way lower for an upgrade- but then I paid the full price for version 4 a few years back.)

In spite of me promising myself to be very careful with unnecessary spending, this seemed to be a worthy one. (Especially after a serious research into other pattern making programs- more professional ones are very very expensive. Cracked versions online are infested with trojans, so I am not going to risk losing my Pc to that!) The footer shows the name of the pattern, and you can use different line styles to use on multisized patterns. So the Gwyneth skirt pattern has been updated

Download Gwyneth Skirt Pattern from Burdastyle.com


Obviously there are a few fashion design programs on my wishlist for the future: The PatternMaker looks great for my needs, however the version that allows grading multisized patterns is a $1199 !!!! And it is not even the most expensive one.


Marvellous Designer ($199) is fun, you get to make a dress on a 3D avatar- completely unconventional approach, but not sure what kind of flat pattern quality it produces, very little information available- I have a trial software, which will expire in 28 days, so I have some time to check it out.


Of course, there are FashionCad, Optitex and Accumark - the Daddies of the CAD pattern making world, but they are very complicated for my current needs.

(And, of couse there is this lad in Morocco, who claims he can sell me any of those, fully functioning  for £350 and throw in a free one of my choice)


I am now working on a new pattern inspired by House of Pinheiro, recent Betty Jackson paperbag skirt project, and it will also be available for free download, so stay tuned!


©2012 copyright Sewing And Style.
All rights reserved.
All images and copied text must have a link back or reference to Sewing and Style Den

Sunday, April 15, 2012

Back to basics and MMM'12 pledge

…and I don't mean sewing tops and pants, I am talking- returning to PatternMaster Boutique from Wildginger.com!

I firsrt purchased it around 2007, but I switched from PC to Mac since and as this software is only PC compatible, I had never really discovered it true potential.

Today though, I have installed a Virtual Box software and put Windows Vista running on it- on my Mac, simultaneously with my Mac's screen and apps! And i have installed the PMB and it is running! Bliss.

Now, there is a long way to go to recall all the editing tools and options in their Pattern editor- but, hopefully the result will be worth it! I might even start designing my own downloadable patterns to offer my readers some day (Oops, my big dream revealed!!! ))))


And last, but not least: I too join the oh-so-contagious sewing bloggers pledge:


"I, Juliette of Sewing and Style Den, sign up as a participant of Me-Made-May '12. I pledge to wear a self-made item of clothing for at least four days a week for the duration of May 2012."


Actually, that can apply to all month of the year- I do wear self made clothes a lot- that is mainly why I try to make wearable clothes and don't do vintage. So I am in! I don't take pics of what I wear every day, but everything I have made ( and still own ) will be used.


And to finish up- here's Harry, contemplating if a modeling career is really for him:

Not bad! Not bad at all!!!!


 ©2010 copyright Sewing And Style.
All rights reserved.
All images and copied text must have a link back or reference to Sewing and Style Den

Wednesday, April 11, 2012

Bias Tape and Mitered Corners- Tutorial


This technique is one of the basic how-tos, when it comes to finishing raw edges with a bias tape. It can be used on huge variety of projects- from clothing to household items.


A quick definition: Bias tape or bias binding is a narrow strip of fabric, cut on the bias (UK cross-grain). The strip's fibers, being at 45 degrees to the length of the strip, makes it stretchier as well as more fluid and more drapeable compared to a strip that is cut on the grain. 


Before applying the bias, it is a good practise to prep it by stretching it under the steam (using your iron). It is trickier when the bias tape is pre-made (commercial) as you might have to fold and press it back to shape. In case of a pre-made tape, try pulling it lengthwise to stretch. The prepped bias will be narrower than unprepped version, but it will be ready to apply to the garment without the risk of it pulling the fabric or distorting the shape later on. It is absolutely vital to prep the bias for finishing curved edges, like armholes and necklines. 

 However in this tutorial we will be only looking at finishing the edges with 90 degrees corners, to easily achieve a neat mitered corner look. 


Step 1


Unfold you bias tape completely Pre-made bias tape will have one side narrower than the other. Unfold the tape and check which side is narrower. Align the right side of the tape facing the right side of the garment, narrow end of the bias tape to the seam allowance. Fold the short end of your tape down at a 90 degree angle to meet the raw edges and start sewing along the crease, do not forget to backstitch a little. 


Step 2


Sew all the way to the corner, stopping about a seam allowance width before the edge. Backstitch. 
Take your garment out from under your presser foot, fold your bias tape up and to the right forming a 90 degree angle. Press neatly with your fingers 


Align the bias tape onto the left along the raw edge and pin. Start sewing , leaving a seam allowance width from the edge, backstitch. Sew along the whole length of the tape required for your project. 


Step 3


Fold the bias tape over the seam allowance, make sure that folded tape is wide on the inside. Pin inside the seam and check on the inside, that the pin caught the edge of the bias tape. That is precisely why having one side wider is important. Tuck the corners in creating a lovely neat milted. Pin frequently. 


Step 4


Topstitch in a seam ditch, but always make sure the tape on the inside is overlapping the seam! That is why careful pinning is so important. Backstitch. P.S.: Some seamstresses like pinning along the bias tape, but with the satin tape, I found the pins leave the hole marks, so try to pin into the seam ditch, rather than the tape itself.


This technique is super easy to apply, even for beginners, just take your time and pin, pin, pin!

Gwyneth Skirt- My RTW Project, part 2

Remember a week ago I joined the RTW Contest  on patterreview.com , but I couldn't enter the Willow skirt I have made before, as the project must be completed during the contest period? 


Well, I have been doing a lot of soul searching one of the day, when a Glee episode, featuring Gwyneth Paltrow came up on TV. I looked up from my laptops screen just before she stunningly performed Cee-Lo’s “Forget You" and there it was- the inspiration MY RTW CONTEST entry!


The stunning grey mini skirt BOY  by  BAND OF OUTSIDERS has instantly brought the solution to my dilemma- not only I would have something for my contest, I would absolutely love to have a skirt like that! LOVE IT!!!!! Originally made from flannel, zip closure, two front pockets, lined interior and leather applications. I had some double knit jersey, satin bias trim and a brass zip- a key combination to success. Well, I hope. And as it seems impossible to buy a real deal these days, it makes all sence to just sew your own.


I used the skirt pattern form Burda style magazine 12/2012


I've altered the pattern a bit,  closing the side darts, transferring them into pleats at waist. I also changed the from piece into a wrap skirt piece.


The first challenge was to finish all edges with a bias trimming. Unfortunately i couldn't get my hands on a leather trimming, largely due to my impatience- I just couldn't wait to start on this project. And the absence of large fabric/haberdashery stores around worked it's magic too , of course. Too bad….


I used a satin bias tape to finish all the edges. As it is essentially a wrap skirt, that meant I had to work around the corners with my bias tape. 

Here is a full tutorial on bias tape and mitered corners how-to !!!!


Oh, and don't forget to sign up for our APRIL GIVEAWAY

Thursday, February 2, 2012

New shapes and new project- intro


I've had my Burda 2/2012 for 3 weeks now and I was really puzzled where to start. So many obvious picks: there is a sexy multi-coloured dress, a stunning straight cut satin dress, asian style dress and those stunning trousers , all perfect to embrace colour blocking trend. 


Howerever

Today I am working on something I have never really considered before and it is this baggy dress 119. This is a new shape for me and it will be interesting how well it will suit me. It is a real hit or miss situation I think. In fact, it is a completely unknown territory for me as I have never even tried anything similar on in my life. 


The choice of fabric for this model falls on an imitation leather jersey, that has been waiting it's turn for a while. It is very thin, but looks like real leather- very cool. 
I got it on ebay.com pure bargain at £3.99 per meter:


I decided to fully line the dress and I am using a tan coloured cotton jersey for it. 

I have to admit- the work has started, so it won't be too long before the finished project post. 
Stay tuned ))))

Wednesday, January 25, 2012

Latest Additions and Latest Mistakes

My latest Library Addition


Setting up goals is a great thing. My problem is always picking the next project. I know a lot of seamstresses that have a few things going on at the same time, so they more or less have no issues of "nothing to do"s and "what's next"s. Personally, I tend to start on something and try and finish it and love it and adore it (if applicable LOL) and then I feel this emptyness with a Big Question in my head again. Last time I decided to make a ruffled cardigan ( which I made) and a lovely dress from La Mia Boutique - pictured on the right. Now i might like it, you might love it, but my husband actually hated it and said that there is no way this will suit me and it is going to make me look like I belong in "Who Framed Roger Rabbit" movie! As a toon ! Wow!

That was enough to put me off the idea of making it ))) I still love it though, but even more so I love my husband and his wonderful blunt ways of making sure I don't look laughable to the world. And if it sounds bad, believe me - he is mostly right about these things. (Don't worry I get him back for it!)


Then another thing- I ordered this black and silver fabric called Silver Shine from www.myfabrics.co.uk , a great site with fantastic bargains and excellent customer servises. The fabrics are always very good quality, fast delivery and so much information available about the purchased fabric, its composition, care advice, etc. I also bought a few luxury lining fabrics there (photos on the right). My white Winter Mood Cardigan's fabric was also purchased there. My favourite part on the website is that you can zoom the fabric, just hovering over it with cursor and really see what you are getting. Only that I didn't look properly and didn't read properly. I just decided it looked like a wool blend thick-ish fabric. Why? See the small images of sample garments on the bottom? Do not be fooled- they are generic models with this fabric intelligently superimposed, so you kinda have a chance to see its uses. Only it forgets that there are such attributes as stiffness and flowey-ness (if that is even a word), so some fabrics will never look like that in those garments in reality. That is what I failed to understand- and ended up with this very soft polyamide see through fabric with a knitted look. When I went back to the site- I realised- that what I saw on the fabrics photo, so i only have myself to blame for it!

So now I have a dilemma- what to do with it. The quality is fantastic, it is not some rag or something you would easily give away. And even though I already set my 12 in 2012 garments to sew, I am thinking.... why not make two of the same goal points. I am talking about a summer cardigan. I think this fabric is perfect for something very simple like this:
This is from Burda Style 1/2011, 126. I would only change the length as I only have 1.5 m of the fabric, I will have to make is just below hip line long, if I am even lucky to get that much out of my piece. It looks dead easy, I might even finish it by tonight if I get started in it straight away. Wouldn't it be interesting to see if I will? Well, no time to waste then, my friends! Talk soon. xxx

Tuesday, January 24, 2012

12 in 2012: My goals drafted!


 I firstly want to thank Su Sews So-So for sharing the idea. Setting up goals is great to keep yourself off the couch and in the sewing room. So when I found this challenge, I decided, it is for me.

So here are my lists ( I am cross the achieved goals off and adding a link as the year progresses:

12 Garments to sew:
  1. A Summer Cardigan
  2. Dress in colour blocking
  3. Red Straight Leg Trousers ( I want to draft the pattern from a pair of perfect trousers I owe)
  4. Wildcard
  5. Wildcard
  6. Trench coat
  7. Wrap jersey Dress
  8. Wildcard!
  9. Hand draped cocktail dress
  10. Corset top
  11. Biker Jacket
  12. 4 Skirts of various shapes: pencil, A-line, Ra-ra, Half-circle

12 New Sewing Techniques with Tutorials:
  1. Setting in sleeves (must finally master this!)
  2. Welt pockets
  3. Lined pockets with flaps
  4. Bound buttonholes
  5. Jacket lapels and collars
  6. Crisp corners on waistbands
  7. Custom Shoulder Pads
  8. Perfect Pleats 
  9. Drafting pattern from ready to wear made garment (pants)
  10. Using a Blind Hem Overlock Presser Foot tutorial
  11. Wildcard!
12 "Never-done-before's" to Try:
  1. Vogue Pattern
  2. Butterwick Pattern
  3. Manequim  Pattern
  4. La Mia Boutique pattern
  5. Sew from a vintage pattern
  6. Make a bag
  7. Model a few types of sleeves
  8. Use boning in my garments
  9. Draft my own pattern 
  10. Wildcard!
  11. Wildcard!
  12. Wildcard!

If you like the idea- please join us and let me know how it is going!

Wednesday, November 9, 2011

The Simplicity of Simplicity ??? Confessions of a Burdaholic

I have to confess- I am addicted to Burda Style magazine patterns. So much so that I will think fifty times before starting on any other brand of patterns, most likely trying to find a similar garment in my Burda magazines collection. It is all about the familiarity, this warm and cozy feeling of knowing how-to's and staying in your comfort zone.

Good or bad? Not great- as I believe that  my opportunities and creativity is somewhat limited and it is a shame not to explore the rest of the sewing pattern world.
If you are wondering why I am disclosing such a cowardly side of mine, I guess the answer is- I need to say it out loud. It is the first step to recovery from my addiction ( but I can't promise it will not relapse).

Here is my detailed confession.

I am used to patterns with no seam allowances included, so having no exact lines to sew over freaks me out . I know- it is very simple and you get used to it and it is actually easier and quicker blah blah blah..... the thought of dealing with it scares the living hell out of me! Enough said!

The next hassle point- remeasuring the pattern and myself, and adjusting. Yes, I do adjustments anyway, always. But with Burda I know exactly where and how much, easy-peasy, no brain damage.

Then the instructions. I find Burda's instructions very comprehensive ( 95% of the time, there is always a dress 119 11/2011 ). Other brands can have pictures and stuff and still not really nail the actual construction technology. Or I am just being bias.

Ok..... I ran out of excuses. Here's the truth. I wanted a tunic for winter, something resembling Audrey Hepburn's grey pullover from "Breakfast at Tiffany's"


After a good search I found a great one, however a bit different from the inspiration. I absolutely loved it!  The pattern is made by Burda, but they don't ship it here. Nor they offer a download option. What a bummer. Then somebody pointed me to the light.

SIMPLICITY 2568 ( kindly provided by Diana Moden magazine, Russian edition 9/2010)


It has three models- two dresses, a tunic and also trousers. I found a download online, printed it and put in a painstaking effort to assemble it all together - makes it harder when it is a scanned in copy  it was not the official download). Aligning- mission  impossible.

I have never used this magazine or Simplicity patterns before, and here I am in a danger zone. When you find yourself unsure, research is the best weapon- so I turned to online forums. It took me a good hour of reading through the posts to come to a few conclusions about these patterns:

  • The ease on the garments is generally very big- if you like tighter fit, you will need to keep this in mind.
  • The allowances are included (1.5cm) unless stated otherwise on the piece. 
  • The back/shoulder width tend to be quite large- adjust for narrow back
  • When printing from a downloaded file make sure the control square on the pattern sheet corresponds to the exact measurements in the magazine/pattern.
  • The measurements for the sizes is only a guideline. Every pattern gives a ready garment measurements chart- make sure you check it and adjust the pattern as needed. 


My challenge number one was the scaling of the pattern sheet image files. I do not really bother to be politically correct about it- if I cannot buy it and there is a scanned copy online- I will get it. My scanned magazines collection is enormous. Sometimes the files come as pdf's, sometimes jpegs, but the way your printer deals with the scaling it always different and it is important to resize images and set up printer correctly for each sheet. It can take ages! Also finding out what that control square measurements should be proved to be a disaster as apparently in that magazine they change their sizes quite often. Mine appeared 5x6.5cm when printed. I am still not sure if it is right.

The next was the  ease allowance. My bust measurement is 82cm and the finished garments 94cm- that is pretty loose, so I took it down to 86cm (4cm on both front and back). I took down another 1cm on the back piece for narrower shoulder width.

The paper pattern doesn't look too loose now, I would like to give it a go in a leftover fabric first to see how it will fit. There is a bit of fabric from my Japanese twisted dress (previous post) left, I might give it a go.

I will start with a top. As the jersey is quite stretchy, I won't be adding the zipper at the back and I might leave the longer sleeve for this one ( like on the checked dress). If the top sits well around the chest and the neck, I can use it for more garments. My husband wants one of them to be definitely a dress. So I am under pressure. I'll keep you posted.

Wednesday, June 29, 2011

Should I stay or should I go? Part 1

I've had enough of planning, brainstorming, dreaming and browsing the patterns for future models! So last night I decided to go through all the existing fabrics in my storages and really I was left with a mixed feeling.  There was a lot of cuts of different fabrics, a few solid colour chiffons, azul blue satin (still unopened plastic bag), a few regular jerseys- nothing spectacular really. And a few lining-type fabrics too. Not hugely inspiring for the amount of space it is all taking. 


And then I came across this coat I was so excited to make a few month ago- it is a Burda 01/2011 cover girl's coat in blue, but blue is the last colour that would suit me, so I opted for red bi-stretch suiting. It looks very vintage, I have to admit. Not in a luxury way. It looks and feels like a thinner version of gabardine and very far from glamourous. This was probably one of the reasons i stopped working on it. The other reason was the pattern itself. the back part is so wide it felt like it was meant for someone with a huge hunchback. I admit I didn't adjust the pattern initialluy and I do have a narrower back that in Burda sizing, but this was way wider than I have ever come across before. And I have been using Burda patterns all my life, so I was very disappointed when I had to literally rip all the seams and re draft the back part. The next issue was the shape of the collar. It was simply weird. 

When I am looking at this picture from the magazine, I can see that the collar is somewhat like mine, but even looks like it is a different shape than the technical drawing. 
On my coat the collar does not join when the coat is on, and take my word for it I followed all instructions and markings properly- it is just not what the picture shows. One of the things that was driving me mad as it just looks wrong! And then I looked at the photo above and the collar there is clearly not joined either- so confusing!!! But mine was still a different shape to the photograph.


Here it is now ( forgive me the creased look, I didn't get a chance to give it a good pressing yet and it has been lying crunched in a bag for ages) The left side is what I had following the pattern instruction, The right side is what it looks like when I sewn the bottom end of the collar right into the front.  Looks more  like it, doesn't it?

But on the other side- this was a few month ago, and I don't really have that bunch of negative emotions when I look at this coat. So I am deciding to make a few adjustments. Firstly I am going to fix the collar. It will be topstiched before completing this part of my coat's revival. As for the fastening I don't want the big buttons - simply as I don't feel bothered with nice looking button-holes (maybe next-time, I have a suspicion they could be the cause of giving up again) So to avoid negativity, I ordered extra large red press studs, that I will attach using a decorative stitch visible from the outside. 


I might not line it either- there is a bit of a fabric used to line the pockets left over, so I am planning to make home made bias tape for the hem allowances and some of the main sometimes visible allowances. 
The sleeves are 3/4- love that, but the total length seems too long, so I will have to play it by eair, so I can wear this coat both with trousers and skirts with equal success. 

Well, this is it so far.  I am off to my sewing machine again and hopefully will be blogging about the finished product in a couple of days.


If anyone wondering why this post is about a coat and not light holiday garments I blogged about last time- the simple reason is the terrible cold June we are having here in Ireland. Very disappointing!
So a light coat is needed urgently and the holiday is still 3 month away. BTW here is a teaser - a fabric I purchased from the States for one of my future holiday dresses)))))


Wednesday, May 25, 2011

Dress 108 Burda 5/2011 (aka take§1: Dragon skin dress)

Today I started on this dress..... I had a cut of suede like fabric, that I bought a couple of month ago for the dress in a February Burda issue, but had too many distractions, so I never got to do anything with it. Now I think there was a special reason for it.

The pattern is great, the seams are beautiful an the dress parts fall together like an easy puzzle. It only needs just over  a meter of a 160cm wide fabric, which is great, you could invest in  really luxury one if you want. The dress pictured here is absolutely stunning largely due to its colourful marble-like jaquard fabric. To me it combines the impressions from the far east - I would love to find and use something like that.

Instead I used this brownish suede feel fabric. I was about to attach the zipper at the back, when my husband saw the dress in the making and was absolutely appauled by how hideous it looked.  I was quite puzzled at I didn't think the fabric was that bad, and even trying the dress on in front of the mirror, I felt it was looking fine. The scandal was about to erupt...

I did take a tea break and when I was back in my workshop, I decided to put the dress onto my dressform, to make some adjustments (as I wasn't going to give up)... when I saw clearly what my husband was on about.

The dress WAS hideous, it looked like some medieval princess dress, only if there were some chiffon sleeves attached. The fabric looked like a skin of a dragon or some other mythical animal, and the whole thing looked like the carnival costume at its best.

So here I am, still admiring the original dress, but disappointed about the morning wasted... But I will be making something using this pattern soon (I hope). A good idea is to use a softer fabric- as the skirt flares out quite strongly. I might also consider adding a standing collar to it- it might make it easier to attach the lining. Well time will show what's going to come out of it, but it won't be in brown suede for sure. LOL

Disqus for Sewing and Style Den